
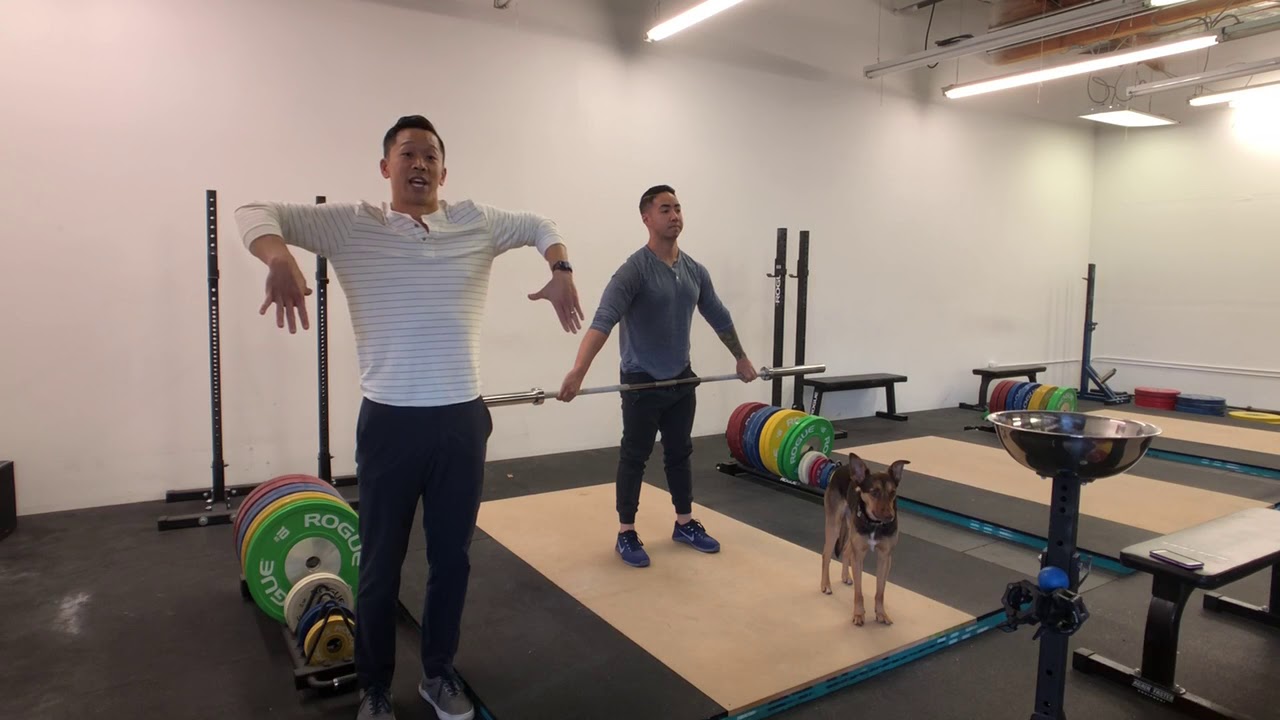
A Sleeper Build Gym is a type of gym that is designed to be unassuming and low-key, yet still provides all the necessary equipment to get a great workout. This type of gym is perfect for people who prefer a smaller, quieter environment to exercise in, and who don't want to pay for the bells and whistles of a larger commercial gym.
Why Build a Sleeper Build Gym?

There are a few different reasons why someone might choose to build a Sleeper Build Gym. One of the most common reasons is simply cost – by building a gym at home, you can save money in the long run by not having to pay for a monthly gym membership. Additionally, a Sleeper Build Gym provides a more private and personalized workout experience, which can be beneficial for people who are uncomfortable exercising in front of others.
How to Build a Sleeper Build Gym

Building a Sleeper Build Gym is relatively simple, but there are a few things you'll need to consider before getting started. First, you'll need to decide on the amount of space you want to dedicate to your gym. This will depend on the type of equipment you want to use and the size of the space you have available.
Next, you'll need to invest in some basic equipment. A few key pieces include a set of dumbbells, a weight bench, and a treadmill or stationary bike. You can also add other equipment as needed, such as a pull-up bar, resistance bands, or an exercise ball.
Tips for Using a Sleeper Build Gym

Once you've built your Sleeper Build Gym, it's important to use it in a way that maximizes your results. Here are a few tips to keep in mind:
- Set realistic goals for yourself and track your progress.
- Make a workout plan and stick to it.
- Mix up your workouts to keep things interesting.
- Stay hydrated and fuel your body with healthy foods.
- Take breaks as needed and listen to your body.
Benefits of a Sleeper Build Gym
There are many benefits to having a Sleeper Build Gym in your home. Some of the most notable include:
- Convenience – you can work out whenever you want, without having to leave your home.
- Privacy – you can exercise in a more private setting without feeling self-conscious.
- Cost savings – you can save money in the long run by not having to pay for a gym membership.
- Personalization – you can choose the equipment and workouts that work best for you.
Conclusion
A Sleeper Build Gym is a great option for anyone who wants to exercise in a more private and personalized setting, without breaking the bank. By following the tips outlined above, you can build a gym that meets your needs and helps you achieve your fitness goals.
Related video of What is a Sleeper Build Gym?

Are you looking for an effective exercise to strengthen your abs? Look no further than the rope pulldown! This exercise is a great way to target and tone the muscles in your abs and improve your overall core strength.
What is the Rope Pulldown?

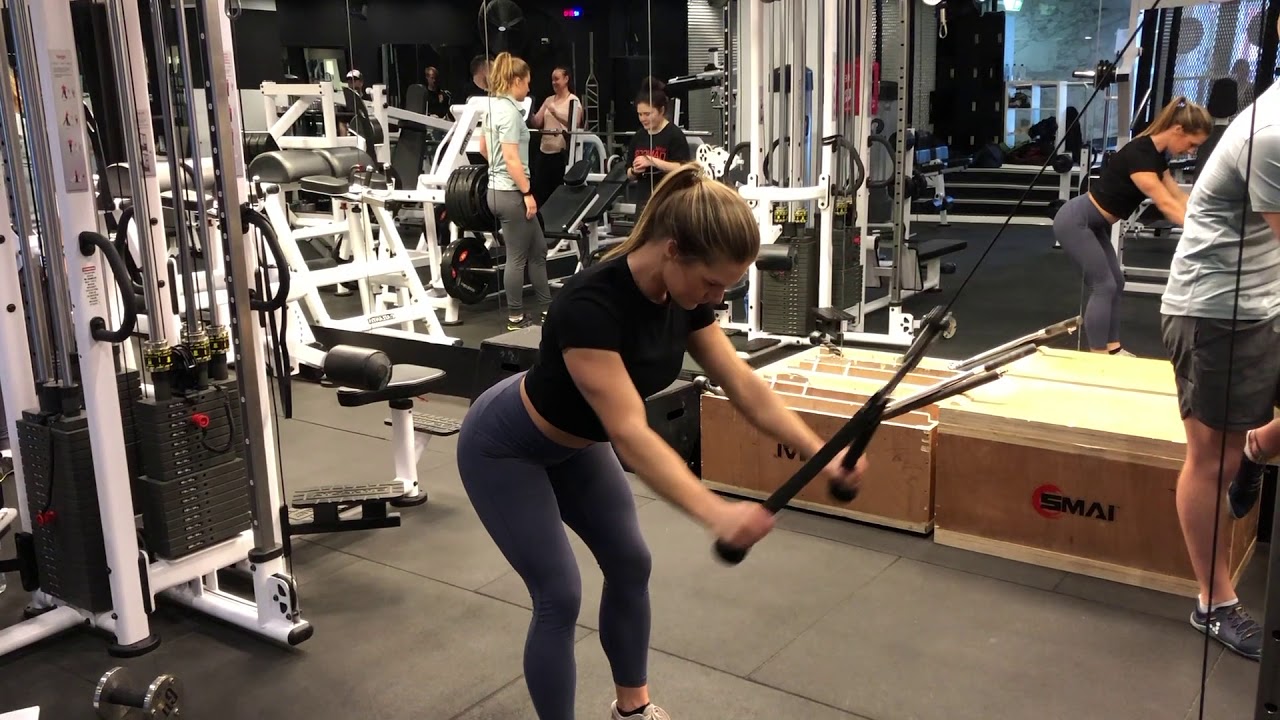
The rope pulldown is an exercise that involves using a cable machine with a rope attachment. You stand facing the machine with your arms extended and the rope in your hands. You then pull the rope down towards your knees, engaging your abs and core muscles as you do so. This exercise is great for targeting the rectus abdominis, obliques, and transverse abdominis muscles.
How to Perform the Rope Pulldown
To perform the rope pulldown:
- Attach the rope to a cable machine and adjust the weight as needed.
- Stand facing the machine with your feet shoulder-width apart and your knees slightly bent.
- Grab the rope with both hands and extend your arms out in front of you.
- Engage your abs and slowly pull the rope down towards your knees, keeping your elbows close to your sides.
- Pause for a moment at the bottom of the movement, then slowly return to the starting position.
- Repeat for the desired number of reps.
Tips for Proper Form

When performing the rope pulldown, it's important to maintain proper form to avoid injury and ensure that you are effectively targeting your abs. Here are some tips to help you maintain proper form:
- Keep your core engaged throughout the movement.
- Keep your back straight and your chest lifted.
- Keep your elbows close to your sides as you pull the rope down.
- Don't use momentum to complete the movement - focus on using your abs to pull the rope down.
- Control the weight as you return to the starting position.
Variations of the Rope Pulldown

There are several variations of the rope pulldown that you can try to add variety to your workout and target different areas of your abs:
- Single-Arm Rope Pulldown: Perform the exercise with one arm at a time to target each side of your abs.
- Twisting Rope Pulldown: Twist your torso as you pull the rope down to target your obliques.
- Overhead Rope Pulldown: Instead of pulling the rope down towards your knees, pull it down towards your shoulders to target your upper abs.
Benefits of the Rope Pulldown

The rope pulldown is a great exercise for strengthening and toning your abs. Some of the benefits of this exercise include:
- Improved core strength and stability
- Toned abs and obliques
- Improved posture
- Reduced risk of injury during other exercises and daily activities
Incorporating the Rope Pulldown into Your Workout

The rope pulldown can be incorporated into your workout in several ways. Here are some ideas:
- Add the rope pulldown to your regular ab workout as one of your primary exercises.
- Superset the rope pulldown with another ab exercise, such as bicycle crunches or planks.
- Use the rope pulldown as a warm-up exercise to activate your core muscles before a heavier workout.
By incorporating the rope pulldown into your workout routine, you can improve your core strength, tone your abs, and reduce your risk of injury. Give it a try and see the results for yourself!
Related video of Rope Pulldown For Abs

Dumbbell punches are a popular exercise that helps build upper body strength and endurance. This exercise involves using dumbbells to perform punches that target the chest, shoulders, arms, and core. It's a great way to build functional strength and improve overall fitness. In this article, we'll take a closer look at the muscles worked during dumbbell punches and how to perform this exercise correctly.
What Muscles are Worked During Dumbbell Punches?

Dumbbell punches work a variety of muscles, including the chest, shoulders, triceps, biceps, forearms, and core. Here's a breakdown of the main muscles worked during this exercise:
Chest
The chest muscles (pectoralis major and minor) are heavily involved in dumbbell punches. These muscles are responsible for pushing the dumbbells away from the body and generating power during the punch.
Shoulders
The shoulders (deltoids) also play a significant role in dumbbell punches. These muscles help stabilize the arms and generate power during the punch.
Triceps and Biceps
The triceps and biceps are the primary movers during dumbbell punches. The triceps extend the arm during the punch, while the biceps flex the arm during the return phase.
Forearms
The forearms (brachioradialis and wrist flexors) are responsible for gripping the dumbbells and maintaining wrist stability during the punch.
Core
The core muscles (rectus abdominis, obliques, and erector spinae) help stabilize the body during the punch and prevent excessive spinal extension.
How to Perform Dumbbell Punches

To perform dumbbell punches, follow these steps:
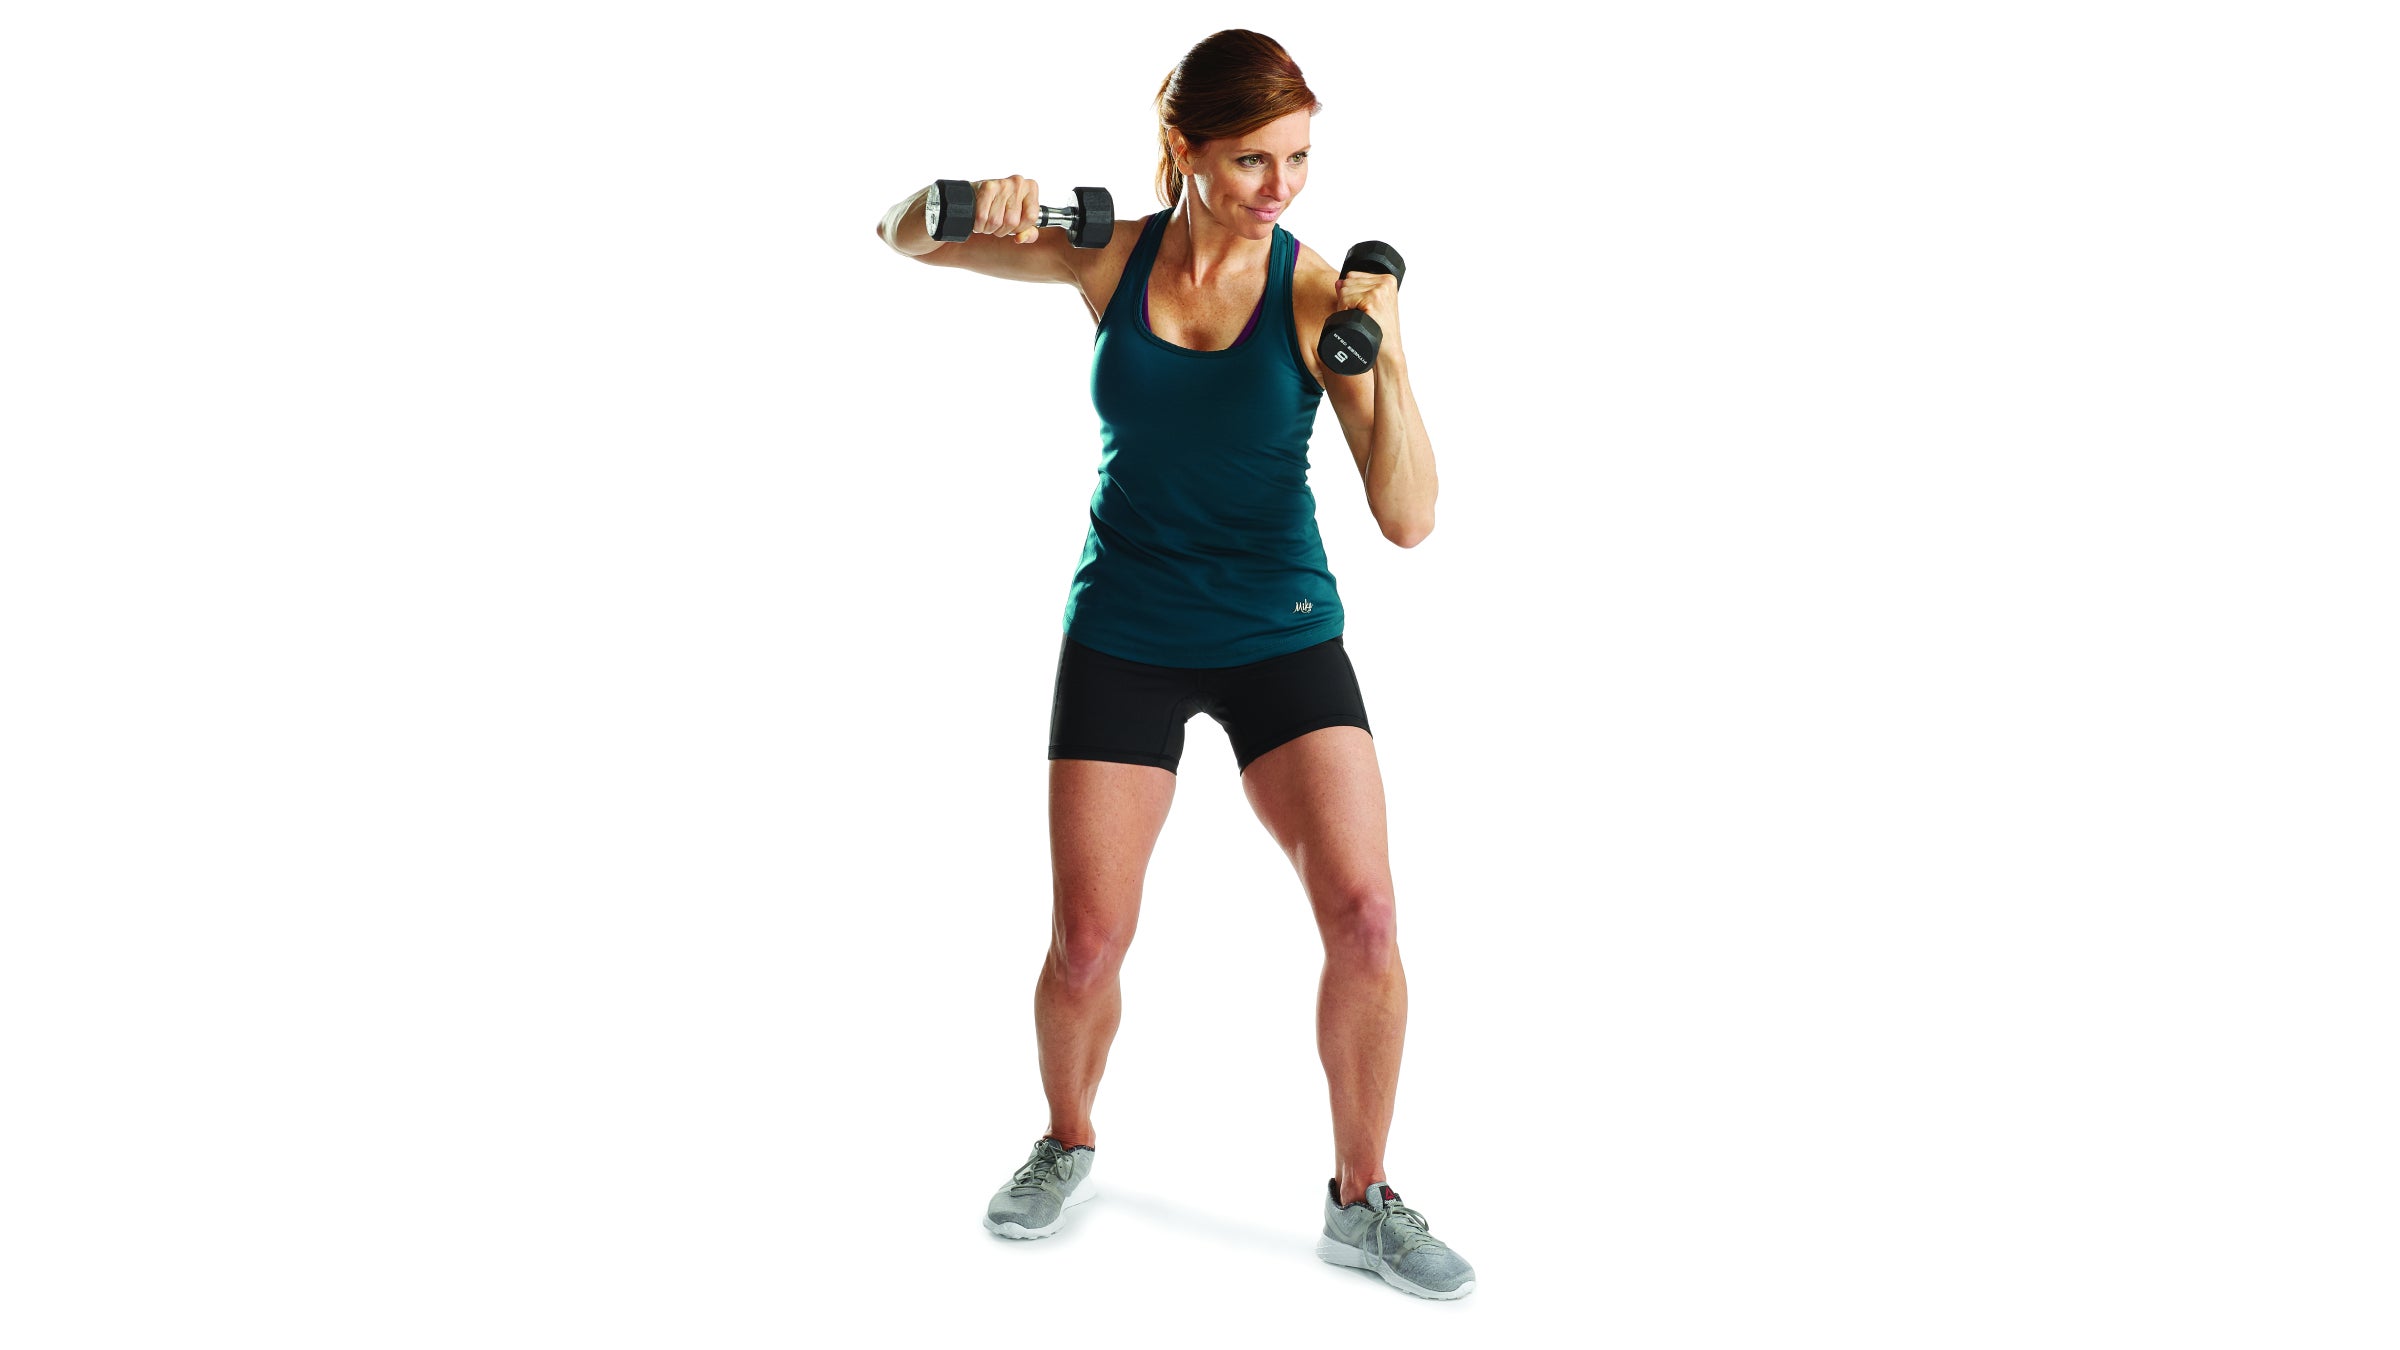
- Stand with your feet shoulder-width apart and hold a dumbbell in each hand.
- Bring your fists up to your chin with your elbows tucked in.
- Extend one arm forward, punching the dumbbell straight out in front of you.
- Return to the starting position and repeat with the other arm.
- Alternate arms for the desired number of repetitions.
It's important to maintain proper form throughout the exercise. Keep your core tight and avoid arching your back. Exhale as you punch and inhale as you return to the starting position.
Variations of Dumbbell Punches
There are several variations of dumbbell punches that you can do to target different muscles and add variety to your workout:
Uppercut Punches
Instead of punching straight out, punch upward in a diagonal motion to target the upper chest, shoulders, and arms.
Hook Punches
Punch outward in a circular motion to target the chest, shoulders, and arms.
Speed Punches
Perform rapid punches to increase cardiovascular endurance and burn more calories.
Heavy Punches
Use heavier dumbbells to increase resistance and build more muscle.
Conclusion
Dumbbell punches are a versatile exercise that targets multiple muscle groups and can be modified to suit your fitness level and goals. By incorporating this exercise into your workout routine, you can build functional strength, improve endurance, and enhance overall fitness.
Related video of Dumbbell Punches Muscles Worked
The barbell back squat is one of the most popular exercises in weightlifting. It is a compound exercise that targets multiple muscle groups and is a staple in most workout routines. The barbell back squat is a complex exercise that requires proper technique and form to execute effectively. This article will discuss the muscles worked during the barbell back squat and how to perform the exercise with proper form.
The Muscles Worked During the Barbell Back Squat

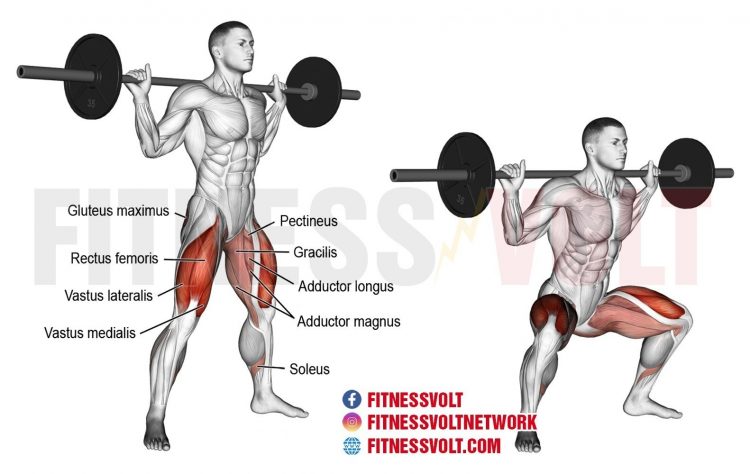
The barbell back squat targets a variety of muscle groups. The primary muscles worked during the exercise are the quadriceps, glutes, and hamstrings. The quadriceps are the muscles located on the front of the thigh and are responsible for knee extension. The glutes are the muscles in the buttocks and are responsible for hip extension. The hamstrings are the muscles located on the back of the thigh and are responsible for knee flexion.
In addition to the primary muscles, the barbell back squat also targets the core muscles, including the rectus abdominis, obliques, and erector spinae. The rectus abdominis is the muscle that runs vertically down the front of the abdomen and is responsible for spinal flexion. The obliques are the muscles located on the sides of the abdomen and are responsible for spinal rotation. The erector spinae is the muscle that runs along the spine and is responsible for spinal extension.
How to Perform the Barbell Back Squat with Proper Form

Performing the barbell back squat with proper form is essential to target the correct muscles and avoid injury. Follow these steps to perform the barbell back squat with proper form:
- Stand with your feet shoulder-width apart and place the barbell on your upper back, resting it on your traps.
- Grip the bar with your hands slightly wider than shoulder-width apart.
- Take a deep breath and brace your core.
- Squat down by bending your knees and pushing your hips back.
- Keep your chest up and your back straight.
- Lower yourself until your thighs are parallel to the ground.
- Push through your heels and extend your knees and hips to stand back up.
- Exhale at the top of the lift and repeat for your desired number of repetitions.
Common Mistakes to Avoid
Performing the barbell back squat with improper form can lead to injury and target the wrong muscles. Here are some common mistakes to avoid when performing the barbell back squat:
- Leaning too far forward
- Not squatting low enough
- Allowing your knees to cave in
- Arching your back
- Not bracing your core
Conclusion
The barbell back squat is a compound exercise that targets multiple muscle groups, including the quadriceps, glutes, hamstrings, and core muscles. Performing the exercise with proper form is essential to target the correct muscles and avoid injury. Remember to avoid common mistakes such as leaning too far forward or not squatting low enough. Incorporate the barbell back squat into your workout routine for stronger legs and a stronger core.
Related video of Barbell Back Squat Muscles Worked
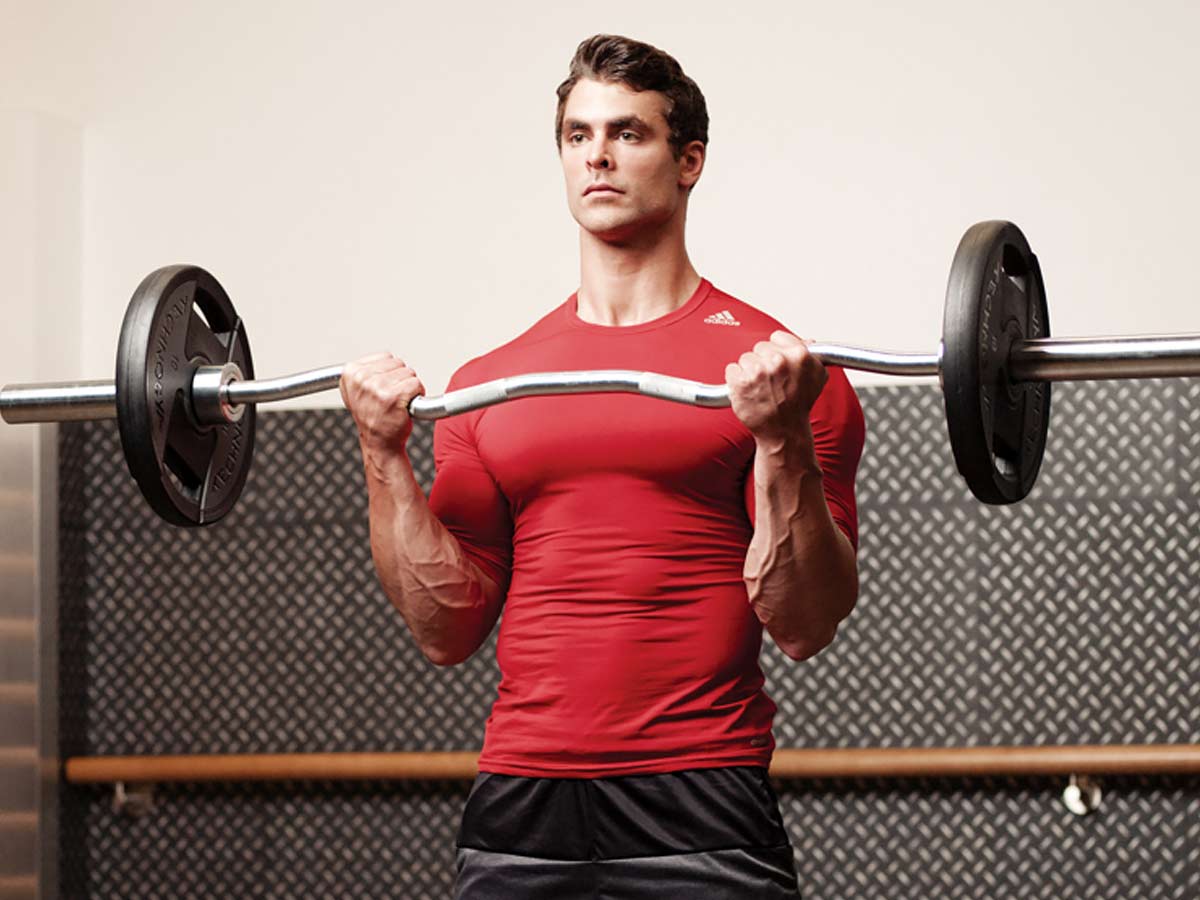
The EZ curl bar is a great piece of equipment that can be used for a variety of exercises. It is especially useful for working your biceps and triceps, as well as other muscles in your arms and upper body. However, if you've never used one before, it can be a bit confusing to know where to start. In this article, we'll go over the basics of how to use an EZ curl bar.
What Is An EZ Curl Bar?
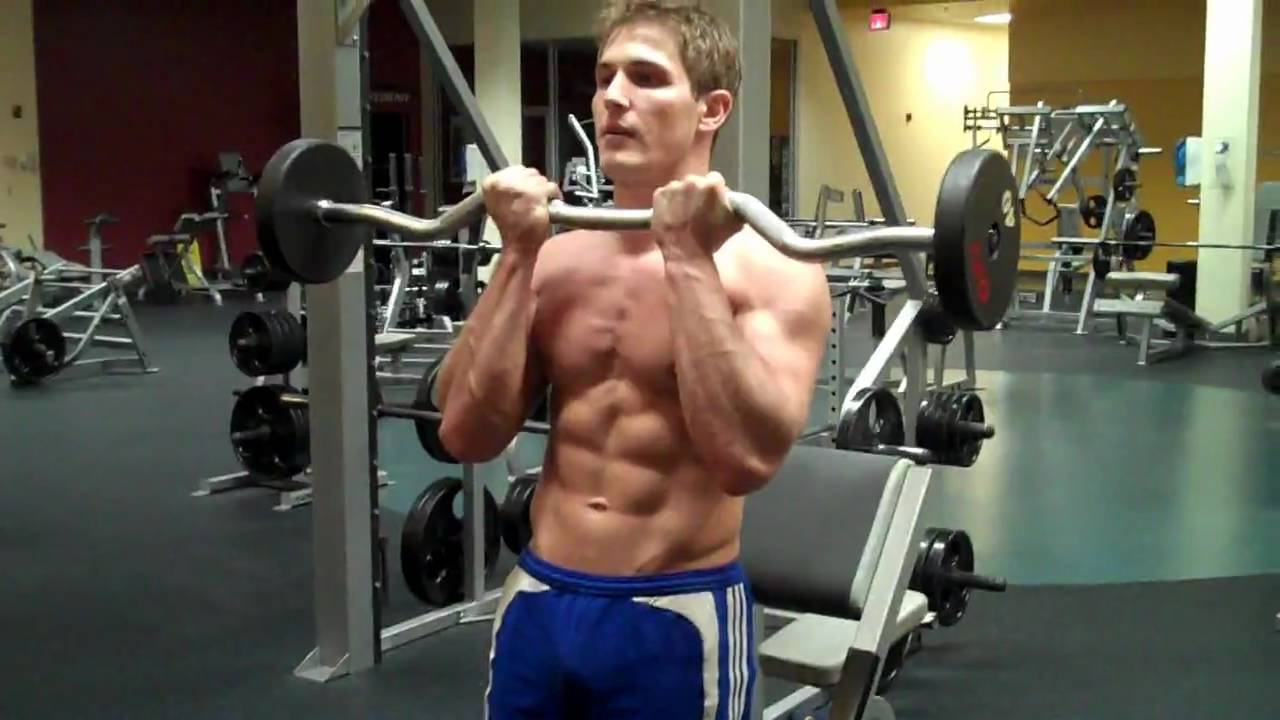
An EZ curl bar is a barbell that has a zigzag shape in the middle. This allows you to grip the bar with your palms facing inward, which puts less stress on your wrists and elbows than a straight barbell. The bar is typically shorter than a standard barbell, which also makes it easier to use for certain exercises.
How To Grip The EZ Curl Bar

When using an EZ curl bar, the way you grip it will depend on the exercise you're doing. However, in general, you'll want to grip the bar with your palms facing inward, and your hands shoulder-width apart. Your thumbs should be wrapped around the bar, and your fingers should be gripping it from the top.
Exercises You Can Do With An EZ Curl Bar

There are many exercises you can do with an EZ curl bar, but some of the most popular ones include:
- Bicep curls
- Tricep extensions
- Hammer curls
- Skull crushers
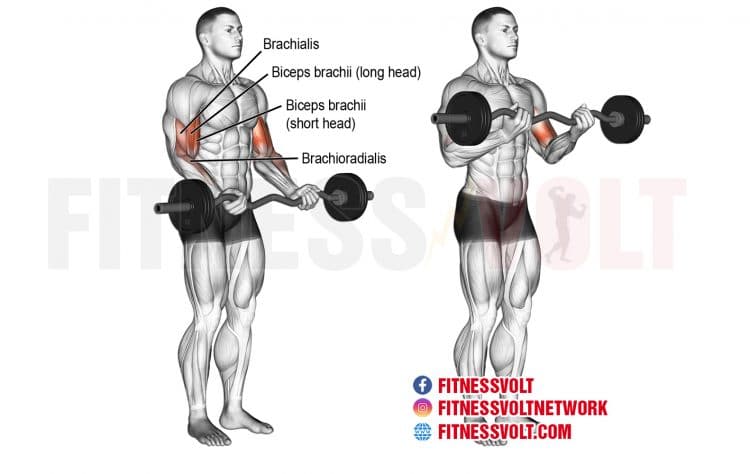
How To Do Bicep Curls With An EZ Curl Bar
One of the most common exercises you can do with an EZ curl bar is bicep curls. To do this exercise:
- Stand with your feet shoulder-width apart, and hold the EZ curl bar with your palms facing inward.
- Keep your elbows pinned to your sides, and slowly curl the bar up towards your shoulders.
- Pause for a moment at the top of the movement, and then slowly lower the bar back down.
How To Do Tricep Extensions With An EZ Curl Bar

To do tricep extensions with an EZ curl bar:
- Stand with your feet shoulder-width apart, and hold the EZ curl bar with your palms facing inward.
- Extend your arms straight up above your head, and keep your elbows close to your ears.
- Bend your elbows, and slowly lower the bar down behind your head.
- Pause for a moment at the bottom of the movement, and then slowly raise the bar back up to the starting position.
How To Do Hammer Curls With An EZ Curl Bar

To do hammer curls with an EZ curl bar:
- Stand with your feet shoulder-width apart, and hold the EZ curl bar with your palms facing inward.
- Keep your elbows pinned to your sides, and slowly curl the bar up towards your shoulders.
- Pause for a moment at the top of the movement, and then slowly lower the bar back down.
How To Do Skull Crushers With An EZ Curl Bar
To do skull crushers with an EZ curl bar:
- Lie flat on a bench, and hold the EZ curl bar with your palms facing inward.
- Extend your arms straight up above your chest, and keep your elbows close to your ears.
- Bend your elbows, and slowly lower the bar down towards your forehead.
- Pause for a moment at the bottom of the movement, and then slowly raise the bar back up to the starting position.
Tips For Using An EZ Curl Bar

Here are a few tips to keep in mind when using an EZ curl bar:
- Start with a lighter weight than you think you can handle, especially if you're new to using an EZ curl bar.
- Focus on keeping your elbows pinned to your sides for most exercises.
- Move slowly and with control, especially on the lowering portion of the exercise.
- Don't swing the bar or use momentum to lift the weight.
- Always warm up before using an EZ curl bar, and stretch afterwards to prevent injury.
Conclusion
The EZ curl bar is a versatile piece of equipment that can help you build strength and muscle in your arms and upper body. By following the tips and exercises outlined in this article, you can start using an EZ curl bar with confidence and see results in no time!
Related video of How To Use Ez Curl Bar

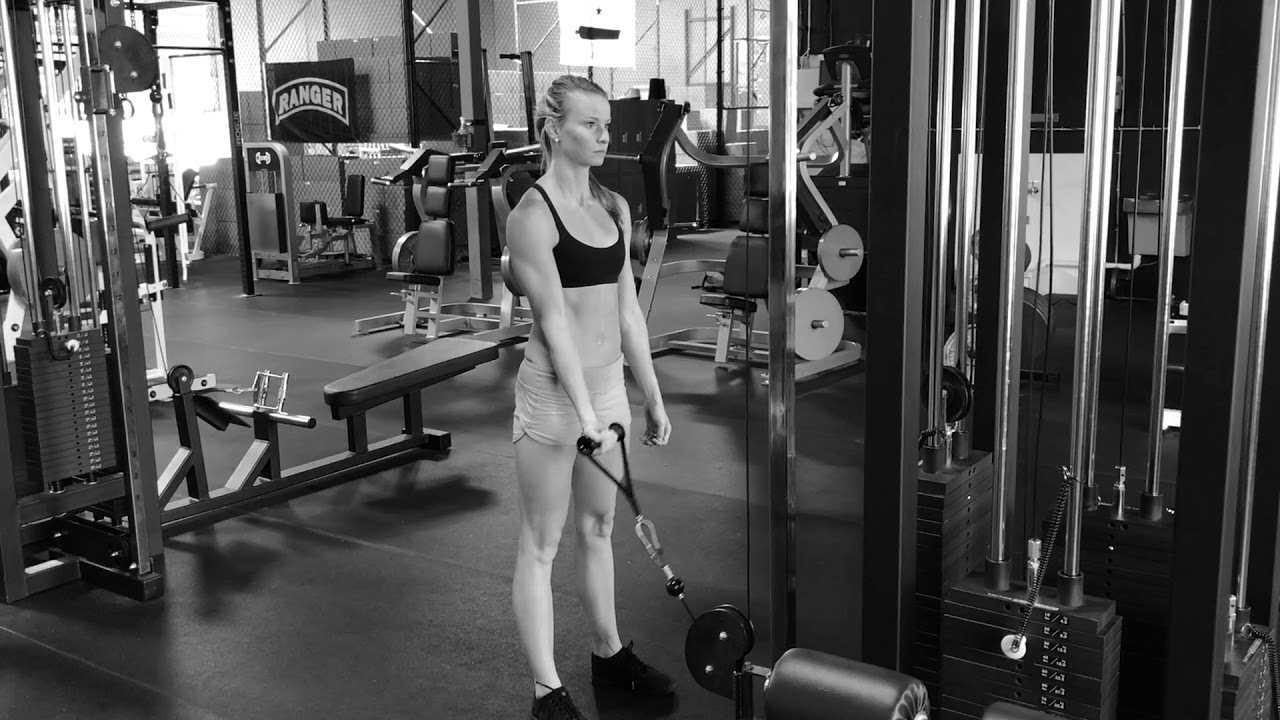
When it comes to building bigger biceps, there are many exercises that can help you achieve your goal. One of the most effective exercises is the single arm cable curl. This exercise targets your biceps and helps you to build muscle mass and increase strength. In this article, we will explain how to perform the single arm cable curl and its benefits.
What is the Single Arm Cable Curl?

The single arm cable curl is a bicep exercise that is performed using a cable machine. This exercise involves standing in front of the cable machine with one arm extended, holding onto the handle. You then curl the handle towards your shoulder, contracting your bicep muscles, before slowly lowering the weight back down to the starting position.
How to Perform the Single Arm Cable Curl

The single arm cable curl is a simple exercise that can be easily performed with the following steps:
- Stand in front of the cable machine with your feet shoulder-width apart.
- Hold the handle of the cable machine with one hand, keeping your elbow close to your body.
- Curl the handle towards your shoulder, keeping your upper arm stationary.
- Hold the contraction for a few seconds at the top of the movement.
- Slowly lower the weight back down to the starting position.
- Repeat for the desired number of repetitions before switching arms.
Benefits of the Single Arm Cable Curl

The single arm cable curl offers several benefits, including:
- Increased muscle activation: The cable machine allows you to maintain constant tension on your biceps throughout the entire movement, resulting in increased muscle activation and growth.
- Improved muscle symmetry: Performing the exercise one arm at a time helps to improve muscle symmetry, ensuring that each arm receives an equal amount of work.
- Variety in training: Adding the single arm cable curl to your training routine can help to add variety and prevent boredom, as well as avoid a plateau in progress.
Tips for Performing the Single Arm Cable Curl
Here are some tips to ensure that you get the most out of your single arm cable curl:
- Use a weight that is challenging but manageable, and focus on maintaining proper form throughout the exercise.
- Keep your elbow close to your body to maximize bicep activation and prevent injury.
- Hold the contraction at the top of the movement for a few seconds to increase time under tension and promote muscle growth.
- Exhale as you curl the weight towards your shoulder, and inhale as you lower the weight back down.
Incorporating the Single Arm Cable Curl into Your Training Routine

The single arm cable curl can be incorporated into your bicep training routine in a variety of ways. Here are three different options:
- Perform the exercise as part of a full-body or upper-body workout, using it as a supplemental exercise after compound movements like bench press or rows.
- Incorporate the exercise into a bicep-specific workout, performing multiple sets of 8-12 repetitions with each arm.
- Use the exercise as a finisher at the end of your bicep workout, performing a high-rep set of 20-30 repetitions with each arm to increase metabolic stress and promote muscle growth.
Conclusion
The single arm cable curl is a simple yet effective exercise that can help you to build bigger, stronger biceps. By incorporating this exercise into your training routine and following the tips outlined in this article, you can maximize your results and achieve your fitness goals.
Related video of Single Arm Cable Curl: How to Build Bigger Biceps with One Simple Exercise

Most people hit the gym to build their chest, arms or legs, but often, they forget about their shoulders. Strong shoulders not only improve your overall physique but also help maintain good posture. The single arm rear delt cable fly is an excellent exercise that targets the rear delts, upper back, and rotator cuff muscles. It is easy to perform and can be done with a cable machine or resistance band.
Why Should You Do Single Arm Rear Delt Cable Fly?

The shoulder joint is one of the most mobile joints in the human body, and it is susceptible to injuries if not trained properly. Neglecting shoulder exercises can lead to poor posture, shoulder pain, and even impingement syndrome. The single arm rear delt cable fly targets the rear deltoids, which are often overlooked in traditional shoulder exercises. The rear delts play a vital role in stabilizing the shoulder joint, preventing injuries, and improving posture.
How To Do Single Arm Rear Delt Cable Fly?

Start by attaching a D-handle to a cable machine or resistance band at shoulder height. Stand with your side facing the machine and grab the handle with one hand. Keep your feet shoulder-width apart, and your knees slightly bent. Position your arm straight out in front of you, with your palm facing down. This is your starting position.
Slowly raise your arm out to the side, keeping your elbow slightly bent. Continue lifting your arm until it is parallel to the ground. Pause for a second at the top of the movement, then slowly lower your arm back to the starting position.
Complete 10-12 reps on one side before switching to the other side. Aim for 3-4 sets on each side, with 30-60 seconds of rest between sets.
Tips To Maximize Your Workout
Here are some tips to help you get the most out of your single arm rear delt cable fly:
- Focus on the movement and avoid swinging your arm.
- Keep your core engaged throughout the exercise to maintain good posture.
- Use a weight that challenges you but allows you to perform the exercise with proper form.
- Do not lift your arm above your shoulder level, as it can put unnecessary stress on your rotator cuff muscles.
- Breathe in as you lower your arm and breathe out as you raise it.
- Vary your grip and hand position to target different areas of your rear delts.
Conclusion
The single arm rear delt cable fly is an excellent exercise for building strong shoulders, improving posture, and preventing injuries. It is easy to perform and can be done with a cable machine or resistance band. Remember to focus on the movement, keep your core engaged, and use a weight that challenges you but allows you to perform the exercise with proper form. Incorporate this exercise into your shoulder routine, and you will see the results in no time.
Related video of Single Arm Rear Delt Cable Fly: Build Strong Shoulders and Achieve Better Posture
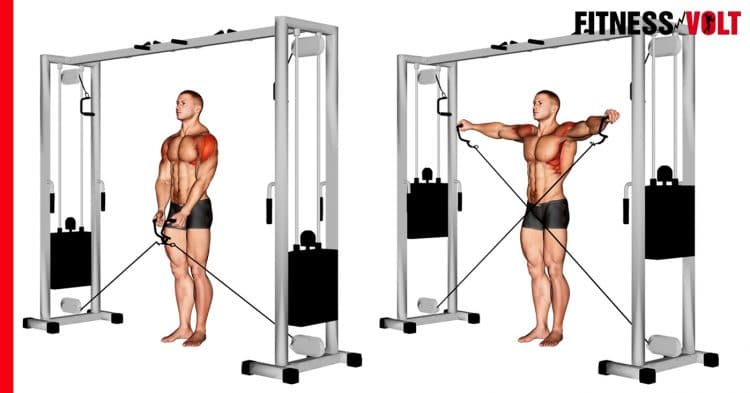
When it comes to building a well-rounded physique, it is important to target all the major muscle groups in the body. The shoulders are one such muscle group that needs to be worked on for a complete and balanced look. The cable lateral raise is an exercise that targets the shoulders and is a great way to build strength and size in this muscle group.
The Muscles Worked
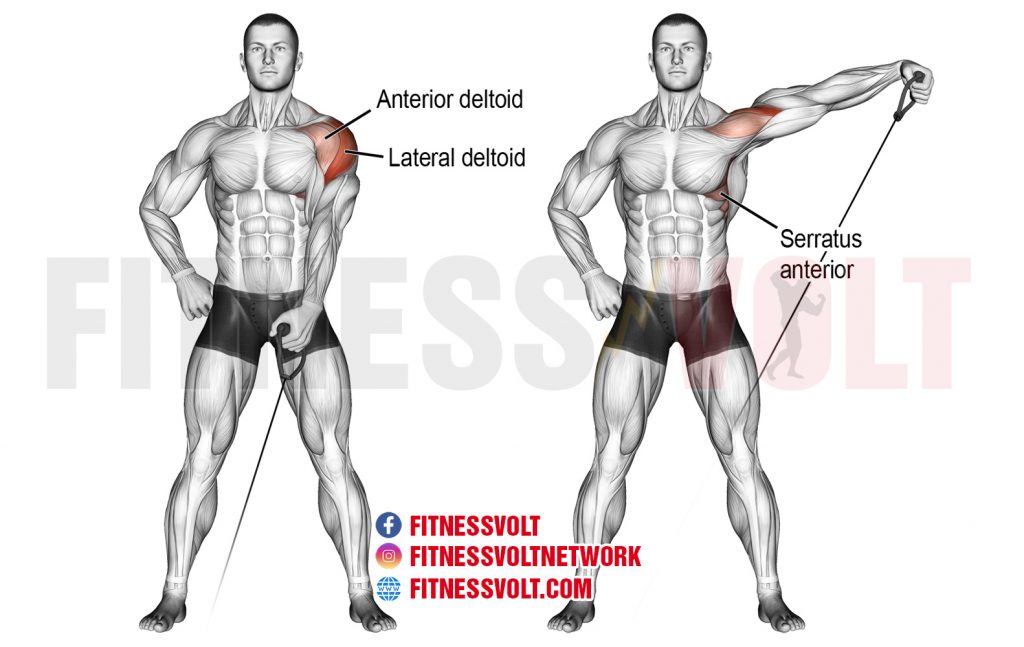
The cable lateral raise primarily targets the lateral deltoids, which are the muscles on the sides of the shoulders. These muscles are responsible for raising your arms out to the sides and away from your body. The exercise also works the anterior deltoids (front of the shoulders) and the trapezius muscles (upper back).
Aside from building shoulder strength and size, the cable lateral raise also helps improve shoulder stability and posture. It can also be a great warm-up exercise before doing heavier shoulder lifts like shoulder presses.
The Proper Form

To perform the cable lateral raise, follow these steps:
- Stand with your feet shoulder-width apart and your knees slightly bent.
- Attach a D-handle to the low pulley of a cable machine and adjust the weight accordingly.
- Grab the handle with your right hand and stand sideways to the machine.
- With your elbow slightly bent, raise your arm out to the side until it is parallel to the floor.
- Hold for a second and then slowly lower your arm back down to your side.
- Repeat for the desired number of reps and then switch to your left arm.
It is important to keep your core engaged and your back straight throughout the exercise. Avoid using momentum to lift the weight and instead focus on using your shoulder muscles to perform the movement.
Variations

There are several variations of the cable lateral raise that you can try to target different areas of the shoulder muscles. Some of these variations include:
- Performing the exercise with both arms at the same time.
- Using different attachments like a rope or a straight bar.
- Performing the exercise while seated to eliminate any momentum from the lower body.
- Performing the exercise with a resistance band instead of a cable machine.
It is important to incorporate different variations of the exercise into your routine to keep your muscles guessing and to prevent plateauing.
Conclusion
The cable lateral raise is a great exercise to add to your shoulder workout routine. It targets the lateral deltoids, anterior deltoids, and trapezius muscles, and helps improve shoulder stability and posture. By following proper form and incorporating different variations of the exercise, you can build strength and size in your shoulder muscles and achieve a well-rounded physique.
Related video of Cable Lateral Raise Muscles Worked
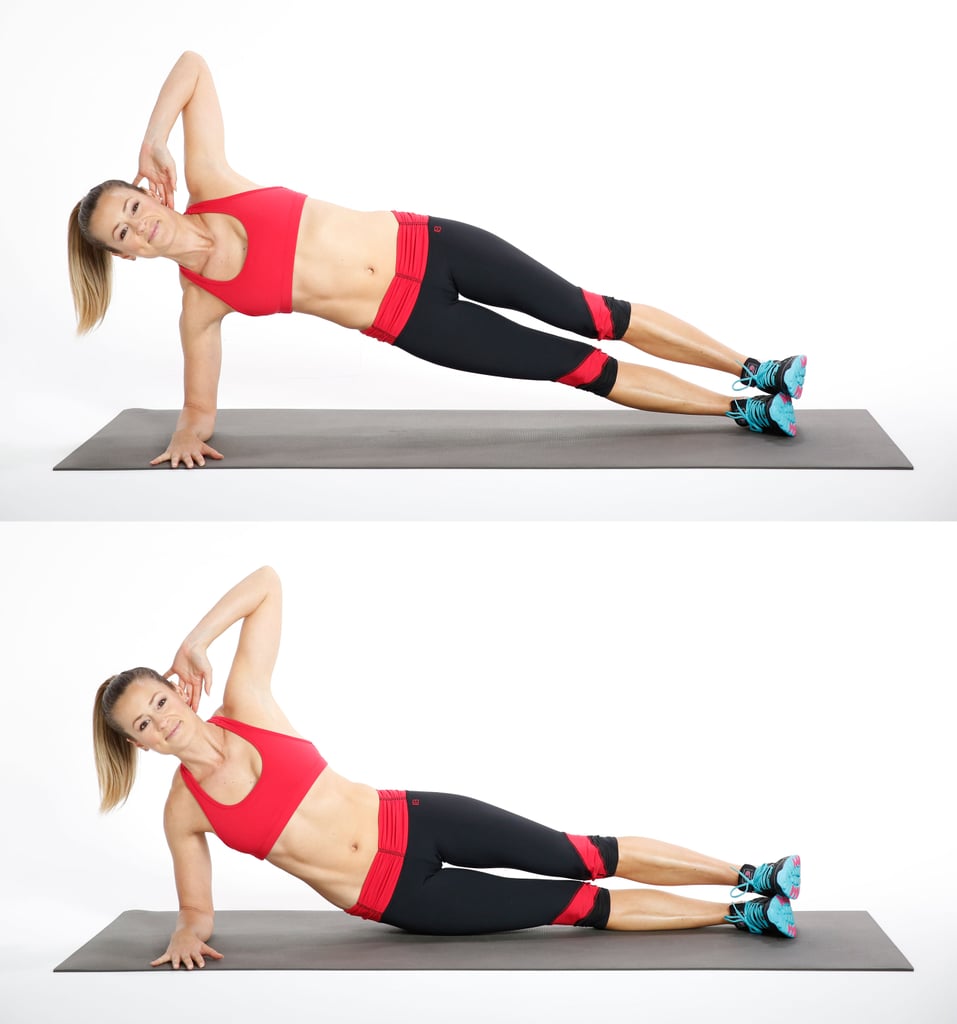
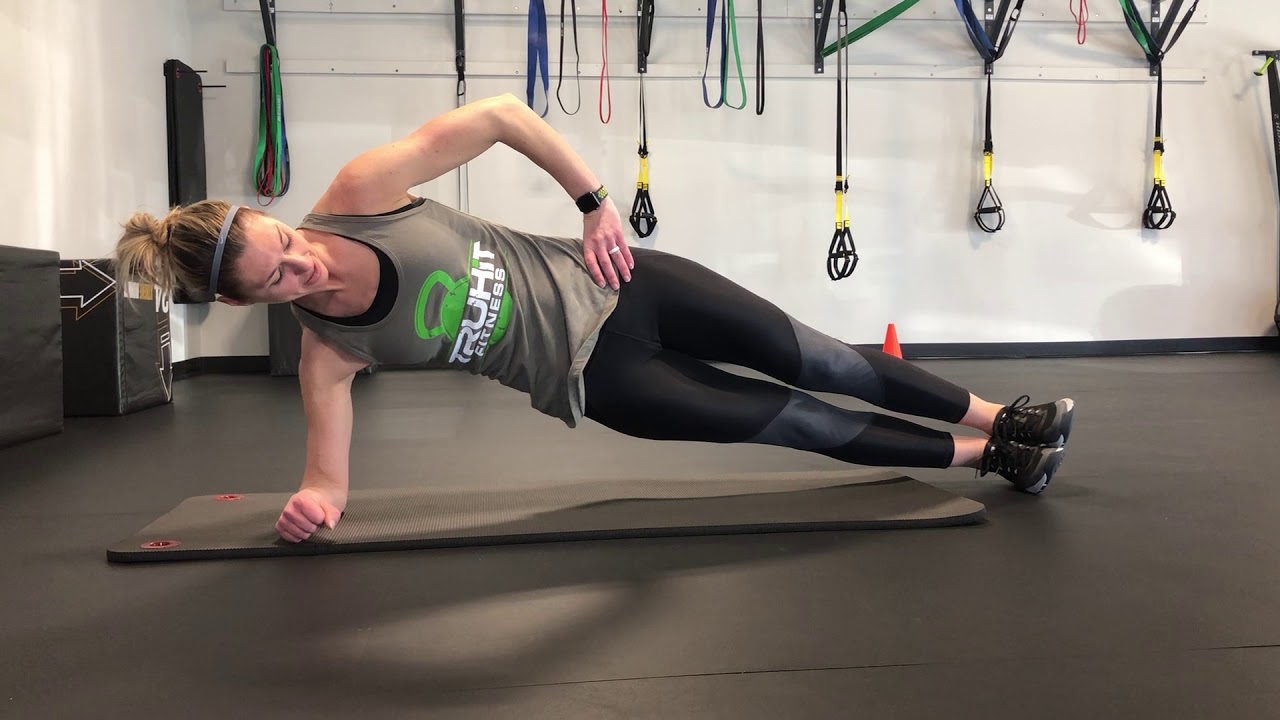
The Side Plank Hip Dip is a popular exercise that helps to strengthen your core and tone your obliques. This exercise is a variation of the traditional side plank and is perfect for those who want to challenge themselves with a more intense workout. In this article, we will discuss the benefits of the Side Plank Hip Dip and how to perform this exercise correctly.
Benefits of the Side Plank Hip Dip

The Side Plank Hip Dip is an excellent exercise for toning your core muscles, particularly your obliques. This exercise also helps to improve your balance and stability, as well as your overall strength. By performing this exercise regularly, you can expect to see improvements in your posture and body alignment, which can help to prevent injuries.
How to Perform the Side Plank Hip Dip
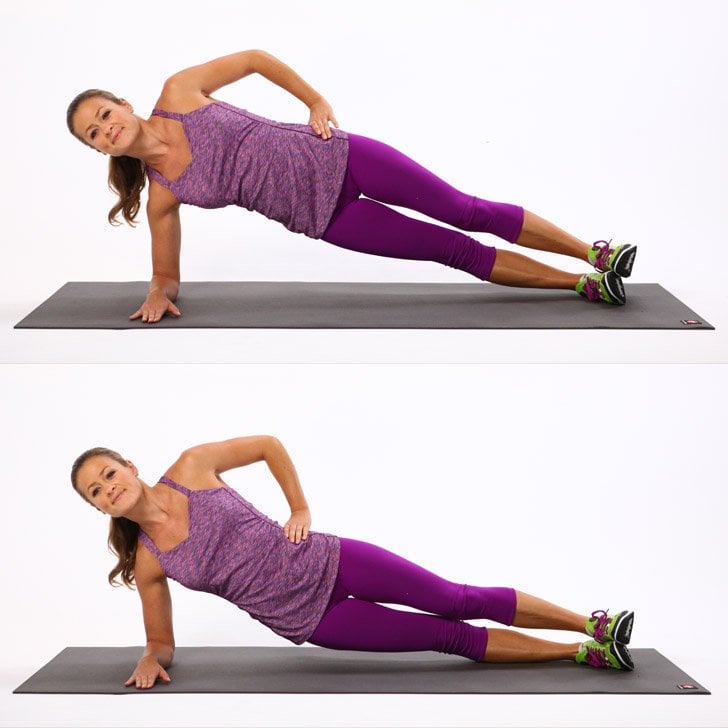
To perform the Side Plank Hip Dip, follow these simple steps:
- Start by lying on your side with your legs straight and your elbow directly beneath your shoulder.
- Lift your body off the ground, keeping your elbow and forearm on the floor.
- Engage your core muscles and lift your hips off the ground until your body forms a straight line from your head to your feet.
- Lower your hips towards the ground, but do not touch the ground.
- Repeat the movement for the desired number of repetitions, then switch sides and repeat.
Tips for Performing the Side Plank Hip Dip

Here are some tips to help you perform the Side Plank Hip Dip correctly:
- Keep your core muscles engaged throughout the exercise.
- Make sure your elbow is directly beneath your shoulder.
- Don't let your hips sag towards the ground.
- Breathe normally throughout the exercise.
- Start with a low number of repetitions and gradually increase as you get stronger.
Modifications and Variations
If you find the Side Plank Hip Dip too challenging, you can modify the exercise by bending your knees and resting them on the ground. This will make the exercise easier and allow you to build up your strength gradually. You can also vary the exercise by lifting your top leg off the ground, or by adding a leg lift.
Conclusion
The Side Plank Hip Dip is an effective exercise that can help to strengthen your core muscles and tone your obliques. By following the tips and guidelines outlined in this article, you can perform this exercise safely and effectively. Remember to start with a low number of repetitions and gradually increase as you get stronger. With regular practice, you can expect to see improvements in your core strength, balance, and stability.
Related video of Side Plank Hip Dip: A Great Exercise for Your Core
The Arnold Press is a popular exercise among fitness enthusiasts and bodybuilders. It is named after Arnold Schwarzenegger, who made this exercise famous during his bodybuilding days. The Arnold Press is a variation of the traditional dumbbell press and is known to work several muscles in the upper body. In this article, we will discuss which muscles the Arnold Press targets and how it can benefit your workout routine.
What is the Arnold Press?
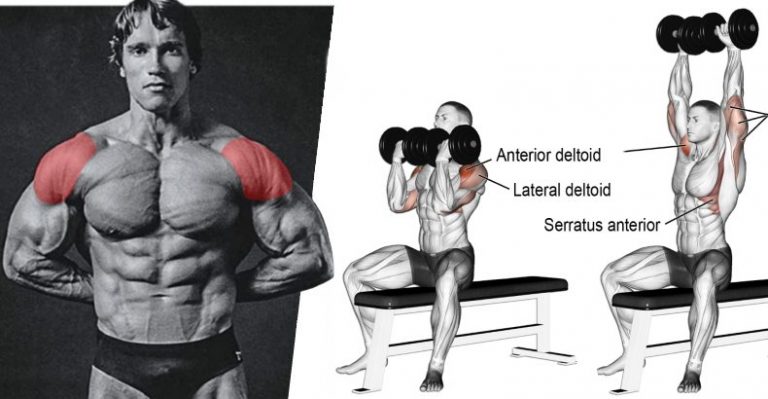
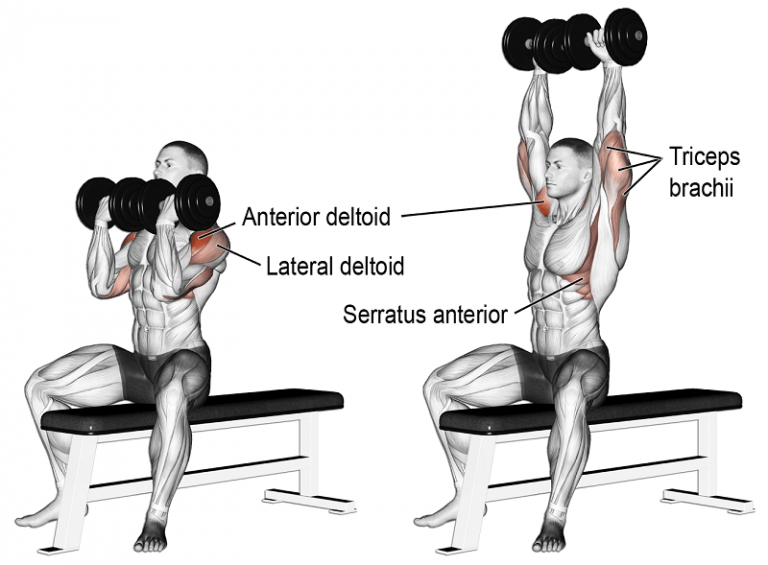
The Arnold Press is a shoulder exercise that targets the front and side deltoids, triceps, and upper chest. It is performed using dumbbells and involves rotating the palms during the lift to engage different muscle fibers in the shoulder muscles. The exercise is done by sitting on a bench or standing with your feet shoulder-width apart and holding the dumbbells at shoulder height with your palms facing inwards.
Which Muscles Does the Arnold Press Work?

The Arnold Press primarily targets the front and side deltoids, which are the muscles responsible for lifting your arms overhead. It also works the upper chest and triceps, which help stabilize the shoulders during the lift. The exercise engages different muscle fibers in the shoulders, which can help develop overall shoulder strength and size.
Benefits of the Arnold Press

The Arnold Press is a versatile exercise that can benefit your workout routine in several ways. Here are some of the benefits of incorporating the Arnold Press into your shoulder workout:
- Targets multiple muscles: The Arnold Press targets several muscles in the upper body, including the front and side deltoids, upper chest, and triceps, making it a great exercise for building overall shoulder strength and size.
- Improves shoulder mobility: The exercise involves rotating the palms during the lift, which helps improve shoulder mobility and range of motion.
- Increases muscle activation: The Arnold Press engages different muscle fibers in the shoulder muscles, which increases muscle activation and can lead to better muscle development.
- Reduces strain on the shoulder joints: The exercise involves a natural movement pattern that puts less strain on the shoulder joints compared to other shoulder exercises.
How to Perform the Arnold Press
Here is a step-by-step guide on how to perform the Arnold Press:
- Start by sitting on a bench or standing with your feet shoulder-width apart and holding the dumbbells at shoulder height with your palms facing inwards.
- Rotate your palms so they face forward and lift the dumbbells overhead until your arms are fully extended.
- As you lift the dumbbells, rotate your palms so they face inward again.
- Lower the dumbbells back to shoulder height while rotating your palms back to the starting position.
- Repeat for the desired number of repetitions.
It is important to maintain proper form during the exercise to avoid injury and maximize results. Keep your core engaged, your back straight, and your elbows slightly bent throughout the movement.
Variations of the Arnold Press

The Arnold Press can be modified to suit different fitness levels and goals. Here are some variations of the Arnold Press:
- Seated Arnold Press: This variation is performed while sitting on a bench and can help stabilize the lower back during the lift.
- Single-Arm Arnold Press: This variation is performed using one arm at a time and can help improve muscle imbalances between the left and right shoulders.
- Standing Arnold Press: This variation is performed while standing and can help engage the core and lower body muscles during the lift.
Conclusion
The Arnold Press is a versatile exercise that targets several muscles in the upper body, including the front and side deltoids, upper chest, and triceps. It is a great exercise for building overall shoulder strength and size, improving shoulder mobility, and increasing muscle activation. By incorporating the Arnold Press into your workout routine and using proper form, you can achieve your fitness goals and take your shoulder training to the next level.